DEHYDRATING: Learn step-by-step how to dehydrate and store vegetables, fruit, and meat for emergencies. Ensure a nutritious food supply during grid outages.
With our guide on dehydrating, you discover smart ways to preserve your favorite produce. This ensures you have nutritious options available during grid outages or emergencies. By removing moisture, you extend the shelf life of your vegetables, herbs, and meat while retaining their essential nutrients. Additionally, this guide teaches you how to dehydrate, where to find reliable dehydrators and the best practices for storing dehydrated food.
WELCOME BACK FROM THE SUNFLOWER CHEF!
Hello! I, the Sunflower Chef, am excited to share my hands-on experience with dehydrating vegetables. Having worked with these techniques for years, I am thrilled to guide you through the process, ensuring you are prepared for any grid outages or emergencies. So, let’s dive into this together!
DEHYDRATING – FIRST CHOOSE A DEHYDRATOR
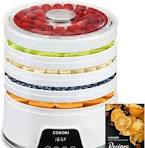
Investing in a reliable food dehydrator is crucial for consistent results. Fortunately, popular brands are available on Amazon, giving you plenty of options. With years of experience in vegetable gardening and dehydrating (including herbs), I’ve tested various dehydrators. For the past four years, I’ve used the Cosori brand and loved it for its ease and reliability. With the potential power grid outage, I’ve accelerated my dehydrating program to include vegetables and meat. (See video below.)

As the Sunflower Chef, I’ve been successfully dehydrating for over twenty years. Through our nonprofit, R & R for Vets, Inc., I work with veterans and their surviving spouses in need. Therefore, I look for value when working with our veterans. Although several great dehydrators are available, I prefer the Cosori brand, particularly the $50 option. It’s affordable, lightweight, and easy to clean, perfect for those with disabilities or older individuals.
Keep an eye out for our links to more information. For example, this page includes links to recipes that can be handy during a power outage. Check out Survival Canned Creamed Chicken or Mushroom Soup Recipes! And Outage Tomato Soup Meals HERE!

Investing in a reliable food dehydrator is essential to achieving consistent results. Thankfully, Amazon offers many popular brands, so you have many options.
Additionally, Amazon offers customer reviews to help you choose the best model. While the Cosori is budget-friendly and performs well for me, your needs may differ.
For more specific brand reviews, explore YouTube:
DEHYDRATING: FIRST, PREPARING VEGETABLES
- Choose Fresh Produce
- Start with fresh, high-quality vegetables. Specifically, look for vibrant colors and firm textures to ensure the best flavor and nutritional value.
- Wash Thoroughly
- Next, rinse vegetables under cold water to remove dirt, pesticides, and contaminants. You can use a recipe for do-it-yourself cleaning solutions or purchase ready spray-on and rinse options.
- Blanch Vegetables (optional)
- After washing, blanch vegetables by briefly boiling them and then plunging them into ice water. This process preserves color, texture, and nutritional content while deactivating enzymes that can cause spoilage. Depending on the vegetable, blanching typically takes 2 to 5 minutes.
- Slice Evenly
- Then, cut vegetables into uniform slices or pieces to ensure even drying. Thinner slices dehydrate faster and more uniformly.
SECONDLY – SET UP THE DEHYDRATOR
- Arrange Vegetables
- First, place the prepared vegetable slices on the dehydrator trays in a single layer, ensuring no overlap for optimal airflow.
- Adjust Temperature
- Next, set the dehydrator to the appropriate temperature for most vegetables, typically between 125°F and 135°F (52°C and 57°C).
- Drying Time
- Finally, dehydrate vegetables for 6 to 12 hours, depending on the type and thickness of the slices. Check periodically to prevent over- or under-drying. When fully dehydrated, vegetables should be crisp and brittle.
DEHYDRATED STORING
Proper storage is crucial to maintaining the quality and longevity of dehydrated vegetables. Therefore, follow these best practices:
- Cool Completely
- First, allow dehydrated vegetables to cool to room temperature before storing them to prevent condensation, which can lead to mold growth.
- Use Airtight Containers
- Next, store dehydrated vegetables, herbs, and meat in airtight containers such as glass jars, vacuum-sealed bags, or Mylar bags with oxygen absorbers. These containers protect against moisture, air, and pests. Since I have limited storage space, I prepare for two people in small jelly jars, typically four ounces.
- Importantly, Label and Date
- Additionally, clearly label each container with its contents and the date of dehydration. This helps you keep track of freshness and rotate your stock accordingly. Hint: I’ve given up on those fancy labels. I keep a roll of masking tape in the kitchen with a permanent marker for labeling. It is easy to apply and remove. Also, it is inexpensive! I’ll admit, it’s not as pretty.
- Store in a Cool, Dark Place
- Moreover, keep your containers away from direct sunlight and heat sources in a pantry, cupboard, or basement. A consistent, cool temperature extends the shelf life of your dehydrated vegetables.
- Check Regularly
- Finally, periodically inspect stored dehydrated vegetables for signs of moisture or pests.
ADDITIONAL RESOURCES
For more detailed instructions and tips on dehydrating vegetables, explore the following resources:
- USDA Food Preservation Guide
- A comprehensive guide on various food preservation methods, including dehydration.
- National Center for Home Food Preservation
Conclusion: Dehydrating vegetables is an effective way to ensure you have access to essential nutrients during grid outages or emergencies. Following these steps to select, dehydrate, and store your vegetables, you can maintain a healthy and balanced diet even when fresh produce is out of reach. Investing in a quality dehydrator and understanding proper storage techniques will provide a reliable food supply, supporting your health and well-being during challenging times.
